
Hey there! If you’re anything like me, you’ve probably spent the last few years staring at the same walls, cabinets, and fixtures thinking, “I really should do something about that.” Well, 2026 is the year to stop thinking and start upgrading!
Whether you’re planning a full kitchen renovation or just want to finally fix that wobbly deck railing, having the right tools makes all the difference between a project you’re proud of and one that ends with a call to a professional (and an empty wallet).
I’ve spent years tackling home projects — some successful, some… let’s call them “learning experiences.” Through it all,
I’ve figured out which tools are genuinely worth your money and which ones just collect dust in the garage. This guide covers 30 essential tools with tips for home upgrades in 2026, organized by category so you can build your collection strategically.
Let’s get to it!
If you’re starting from scratch, here’s how I’d build my collection:
Phase 1 — Foundation ($300-$400):
- Cordless drill/driver
- Tape measure
- Level (4-foot and torpedo)
- Utility knife
- Clamps (assorted)
- Safety glasses and work gloves
- Shop vacuum
Phase 2 — Expanding Capability ($500-$700 more):
- Circular saw
- Jigsaw
- Random orbital sander
- Speed square
- Stud finder
- Painter’s tape and caulk gun
- Putty knife set
Phase 3 — Professional Results ($600+ more):
- Miter saw
- Brad nailer
- Impact driver
- Tile cutter
- Oscillating multi-tool
- Work light
- Knee pads
Power Tools and Tips on Home Upgrades
Power tools are the workhorses of any serious home upgrade project. These will save you hours of manual labor and give you professional-quality results.
1. Cordless Drill/Driver
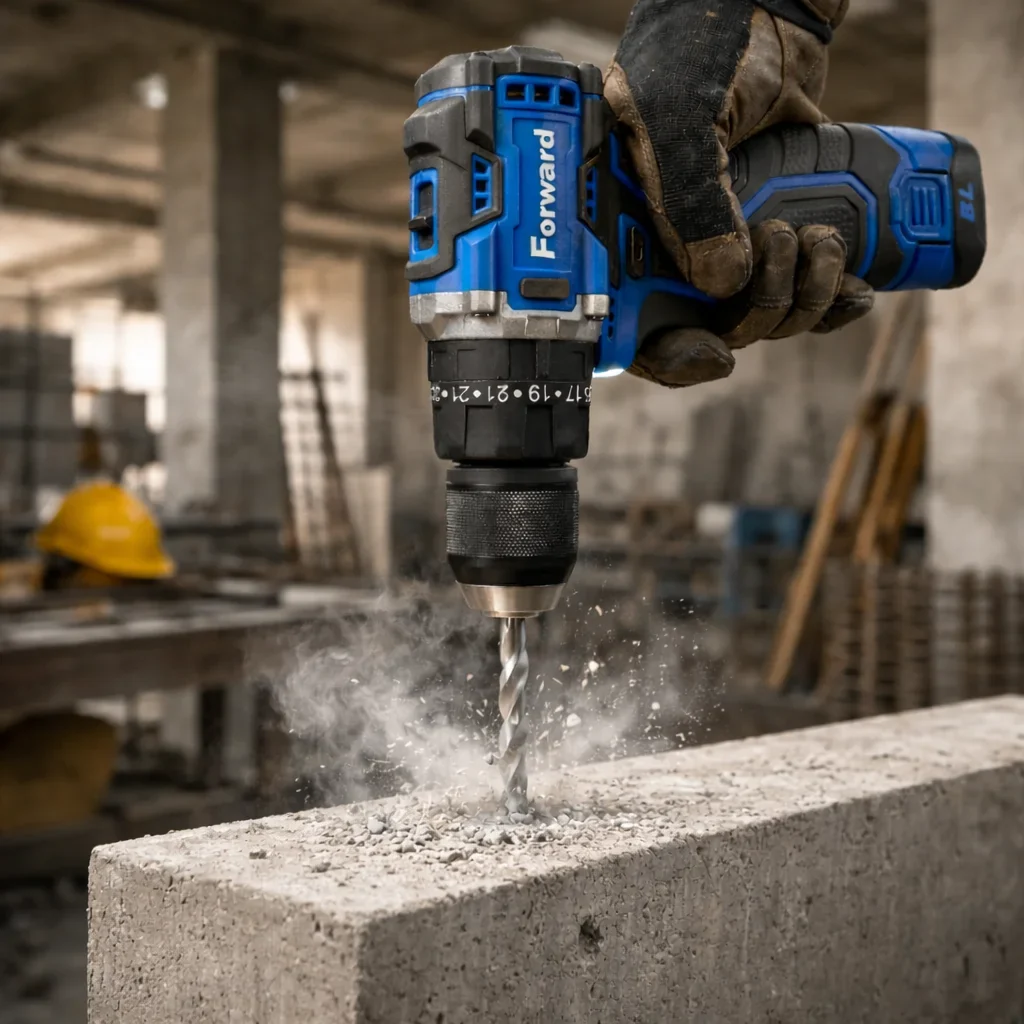
If you only buy one power tool for home upgrades, make it this one. A quality cordless drill/driver handles everything from hanging shelves to assembling furniture to drilling pilot holes for major installations. In 2026, brushless motor models are the standard — they run cooler, last longer, and squeeze more power out of every battery charge. I use mine at least once a week for something around the house.
The key is getting one with enough torque for bigger jobs (think deck building or drilling into masonry) but not so heavy that your arm gets tired during a day of cabinet installation. Variable speed triggers let you start slowly to prevent the bit from walking across your surface, then ramp up for actual drilling. Most modern kits come with two batteries, which is perfect — charge one while you use the other.
Key Information:
- Price Range: $80 – $250 (kit with batteries)
- Best Use Cases: Drilling holes, driving screws, mixing paint or grout with paddle attachments
- Battery Tip: Stick with one battery platform (like DeWalt 20V or Milwaukee M18) so all your cordless tools share batteries
- Pro Tip: Keep a magnetic bit holder on the drill — it saves countless trips up and down the ladder to grab dropped bits
2. Impact Driver
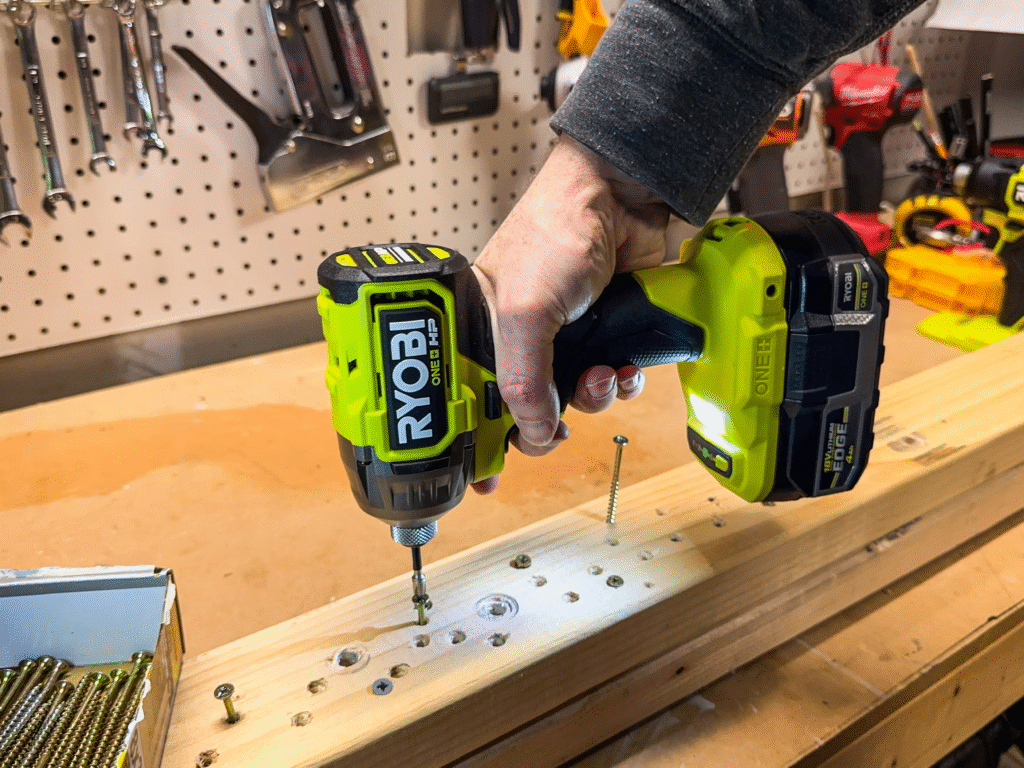
This is the drill/driver’s more aggressive cousin, and once you use one, you’ll never go back for heavy-duty screw driving. Impact drivers deliver rotational impacts (like a hammer tapping the back of the drill) that drive long screws and lag bolts with minimal effort. I used to struggle driving 3-inch deck screws with a regular drill — my wrist would ache, screws would strip, and I’d get frustrated. The impact driver changed everything.
The noise is louder (wear ear protection!), but the results are worth it. The hex chuck accepts bits directly without tightening, so bit changes take seconds. For 2026 home upgrades involving framing, decking, or any project with lots of screws, this tool is non-negotiable.
Key Information:
- Price Range: $100 – $280 (kit with batteries)
- Best Use Cases: Driving long screws, lag bolts, deck fasteners, and cabinet installation
- Noise Warning: Significantly louder than a drill — always wear hearing protection
- Pro Tip: Use impact-rated bits — standard bits will shatter under the hammering action
3. Circular Saw
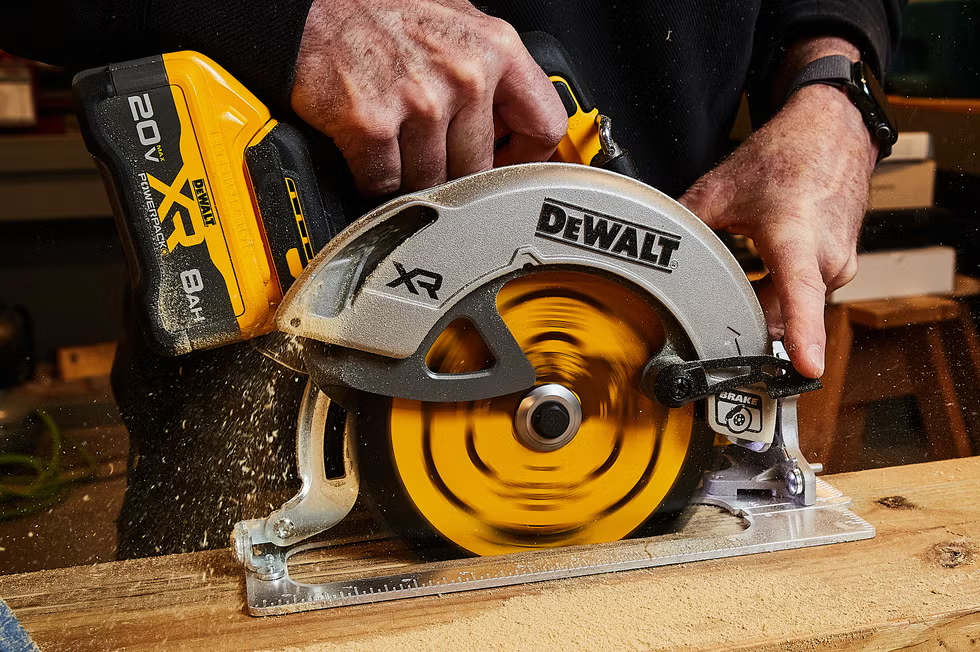
When you need to break down sheet goods (plywood, MDF, OSB) or make long straight cuts in lumber, nothing beats a circular saw. For home upgrades in 2026, a 7-1/4 inch blade model is the sweet spot — it cuts through 2x material in a single pass and handles sheet goods with ease. I’ve built entire built-in bookshelves, cut countertops to size, and trimmed deck boards with mine.
Modern saws come with laser guides or LED lights that cast a shadow line exactly where the blade will cut — game changers for accuracy. A good circular saw with a sharp blade produces cuts clean enough that you often don’t need to sand the edge. Just respect the tool — the blade spins fast and there’s no guard between you and it during a cut.
Key Information:
- Price Range: $60 – $200
- Best Use Cases: Cutting plywood, lumber, trim, and countertop materials
- Blade Tip: Invest in a quality finishing blade (40-60 teeth) for clean cuts in trim and plywood
- Pro Tip: Clamp a straightedge to your workpiece as a guide for perfectly straight cuts — much cheaper than a track saw
4. Jigsaw
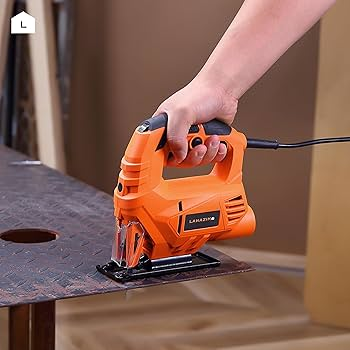
The jigsaw is your go-to for curved cuts, cutouts in countertops, and notching around obstacles. Unlike a circular saw that only cuts straight, a jigsaw blade moves up and down, letting you steer through curves and corners. I used mine to cut the sink opening in my bathroom countertop, notch around door frames for flooring, and cut decorative curves in shelf brackets.
Variable speed control is essential — slower speeds for metal and plastic, faster for wood. The orbital action setting (if your saw has it) moves the blade in a slight oval pattern that clears chips faster for aggressive wood cutting. For 2026 home upgrades involving custom work, this tool adds versatility no other saw can match.
Key Information:
- Price Range: $50 – $180
- Best Use Cases: Curved cuts, sink cutouts, notching, and decorative cutting
- Blade Selection: Use fine-tooth blades for metal, coarse-tooth for wood, and down-cut blades to prevent splintering on visible surfaces
- Pro Tip: Tape your cut line with painter’s tape before cutting — it prevents splintering on the top surface
5. Random Orbital Sander
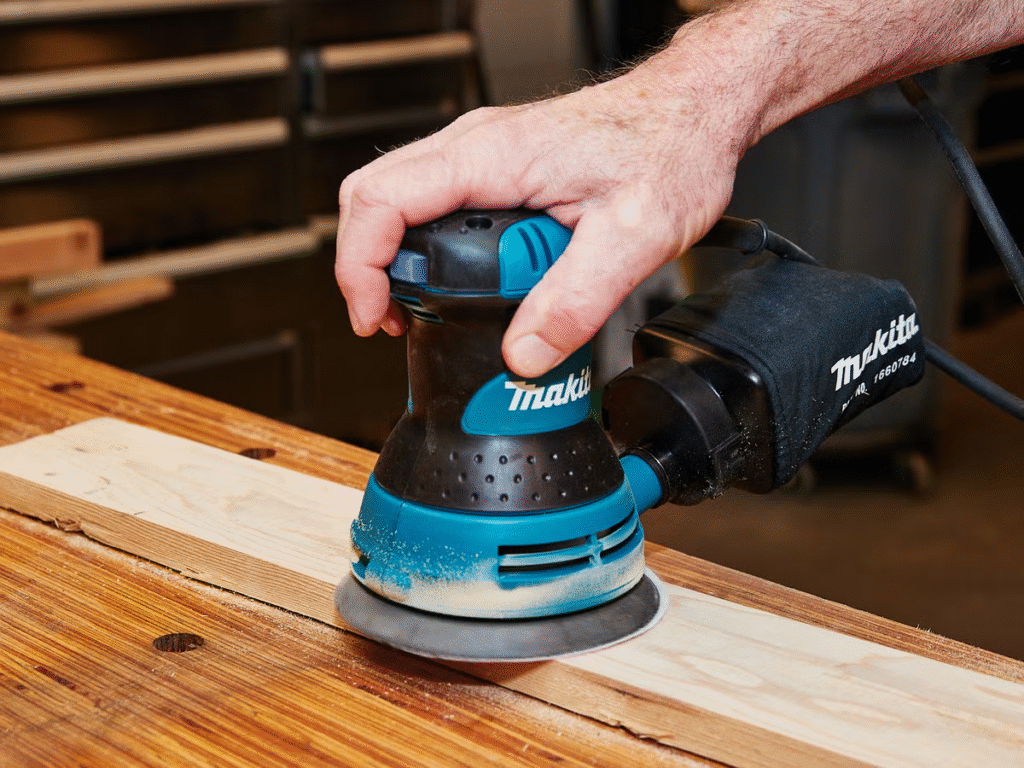
Sanding by hand is miserable and inconsistent. A random orbital sander moves the sanding pad in tiny random circles, eliminating swirl marks while smoothing surfaces quickly. I’ve refinished kitchen cabinets, smoothed drywall patches, and prepped deck railings for staining — all with this one tool.
The dust collection port (hook it up to a shop vac!) keeps your workspace breathable and your lungs happy. Start with coarse grit (80) to remove material fast, then progress through 120, 150, and 220 for a finish-quality surface. For 2026 home upgrades involving painted or stained woodwork, this tool is the difference between amateur and professional results.
Key Information:
- Price Range: $40 – $150
- Best Use Cases: Smoothing wood surfaces, prepping for paint/stain, removing old finishes
- Dust Control: Always connect to a vacuum — fine dust is terrible for your lungs
- Pro Tip: Let the sander do the work — pressing down causes swirl marks and wears out pads faster
6. Miter Saw (Chop Saw)
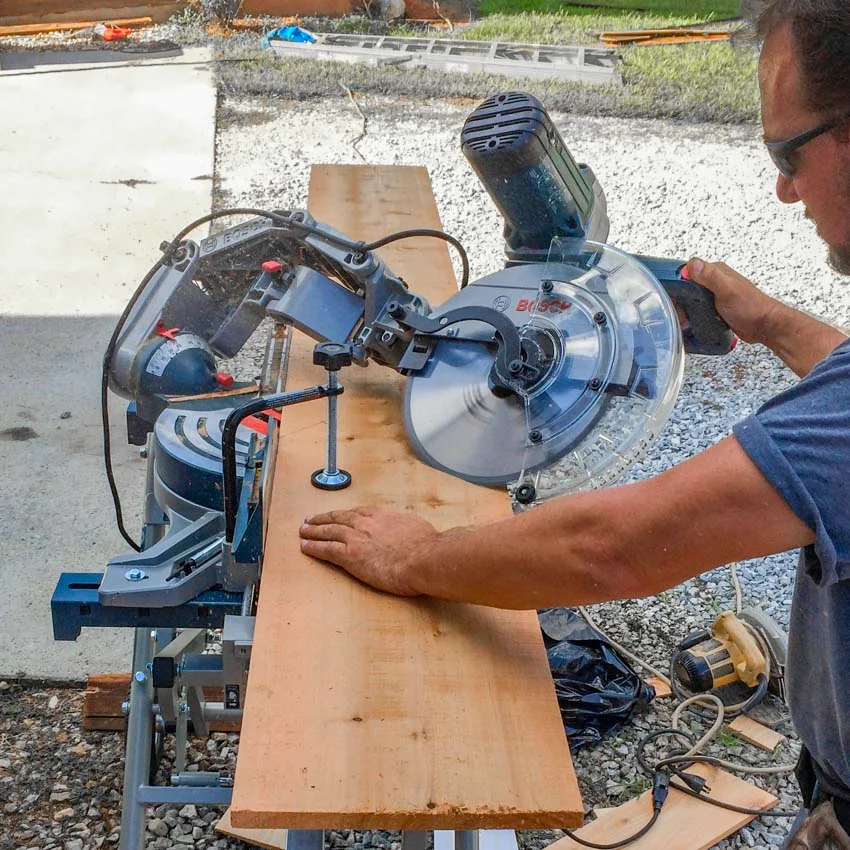
If your 2026 upgrade plans include trim work, crown molding, baseboards, or framing, a miter saw is essential. It makes precise angled cuts quickly and repeatably — critical when you need four pieces of crown molding to meet perfectly at the ceiling corners. I bought mine when I decided to replace all the baseboards in my house, and it paid for itself in the first room.
Compound miter saws tilt the blade in addition to rotating the table, letting you cut complex angles for crown molding without holding the trim at awkward angles. A 10-inch blade handles most home projects; 12-inch gives you more capacity for thicker material. The built-in fence and stops ensure every cut is identical — crucial for professional-looking results.
Key Information:
- Price Range: $150 – $400
- Best Use Cases: Trim cutting, molding, framing lumber, and repetitive angle cuts
- Capacity Tip: A 10-inch sliding miter saw cuts wider boards than a 12-inch non-sliding model
- Pro Tip: Build a simple miter saw station with extended fences and stop blocks — it transforms accuracy and efficiency
7. Reciprocating Saw (Sawzall)
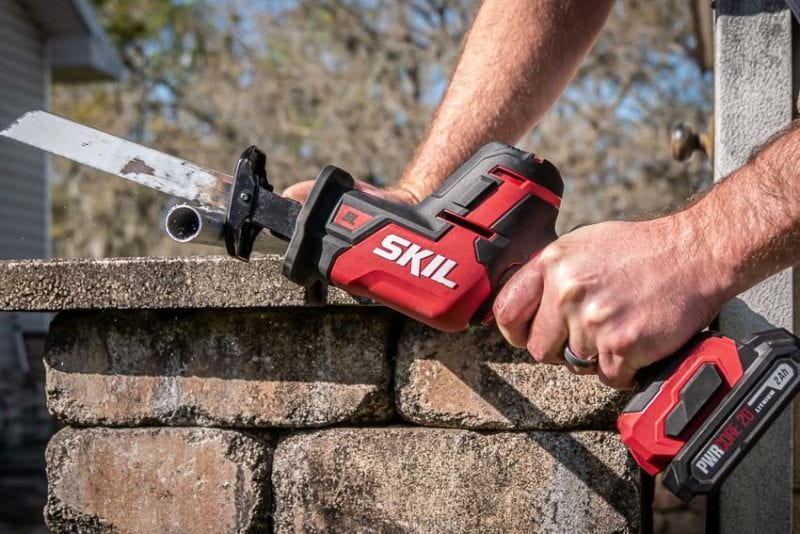
When demolition is part of your upgrade plan, the reciprocating saw is your best friend. This aggressive tool pushes and pulls a blade to cut through nails, pipes, drywall, and old framing like butter. I used mine to remove an old deck, cut out a rusted cast iron pipe, and demo a bathroom down to the studs.
It’s not a precision tool — the blade wobbles slightly and leaves rough edges — but for demolition, nothing is faster. The key is blade selection: bi-metal blades for nails and metal, demolition blades for wood with nails, and carbide blades for cast iron or masonry. For 2026 home upgrades starting with “out with the old,” this tool earns its keep immediately.
Key Information:
- Price Range: $80 – $250
- Best Use Cases: Demolition, cutting pipes, removing old framing, pruning
- Blade Tip: Buy blades in bulk — they dull fast during demo, and you don’t want to stop mid-project
- Pro Tip: Use a longer blade (9-12 inches) for flush cutting — it bends slightly to ride along surfaces
8. Oscillating Multi-Tool
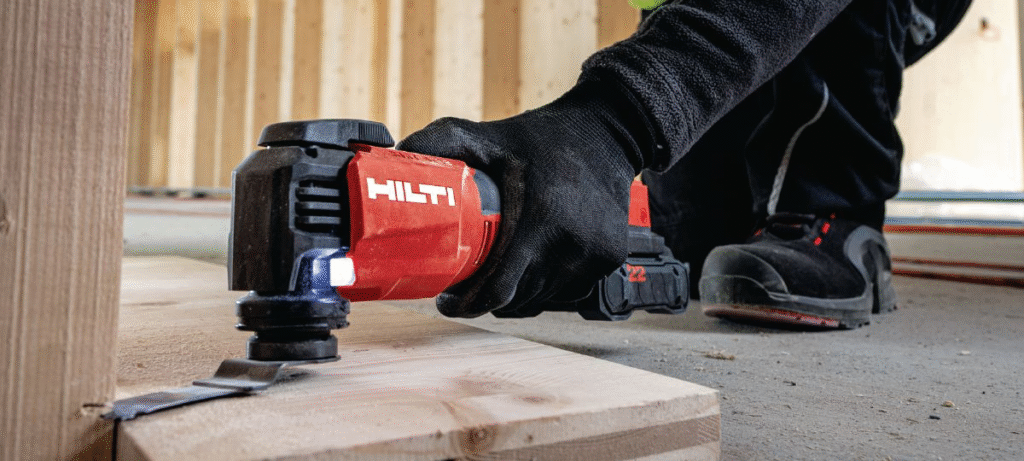
This is the Swiss Army knife of power tools. The oscillating multi-tool vibrates a blade or attachment in tiny arcs, letting you cut, sand, scrape, and grind in tight spaces no other tool can reach. I’ve used mine to undercut door jambs for flooring, remove old grout, scrape paint, and trim shims flush with door frames.
The variety of attachments is staggering — flush-cut blades, grout removal blades, sanding pads, scraping blades, and more. For detailed finish work in home upgrades, this tool solves problems you didn’t know you had. It’s not fast, but it’s precise, and sometimes precision matters more than speed.
Key Information:
- Price Range: $60 – $200
- Best Use Cases: Flush cutting, grout removal, detail sanding, scraping in tight spaces
- Attachment Tip: Buy a kit with multiple attachments — individual blades are expensive
- Pro Tip: Let the tool vibrate at full speed before contacting the work surface — it cuts cleaner and doesn’t grab
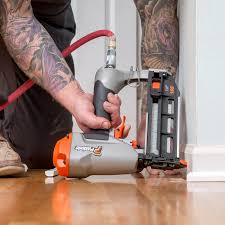
9. Brad Nailer (18-Gauge)
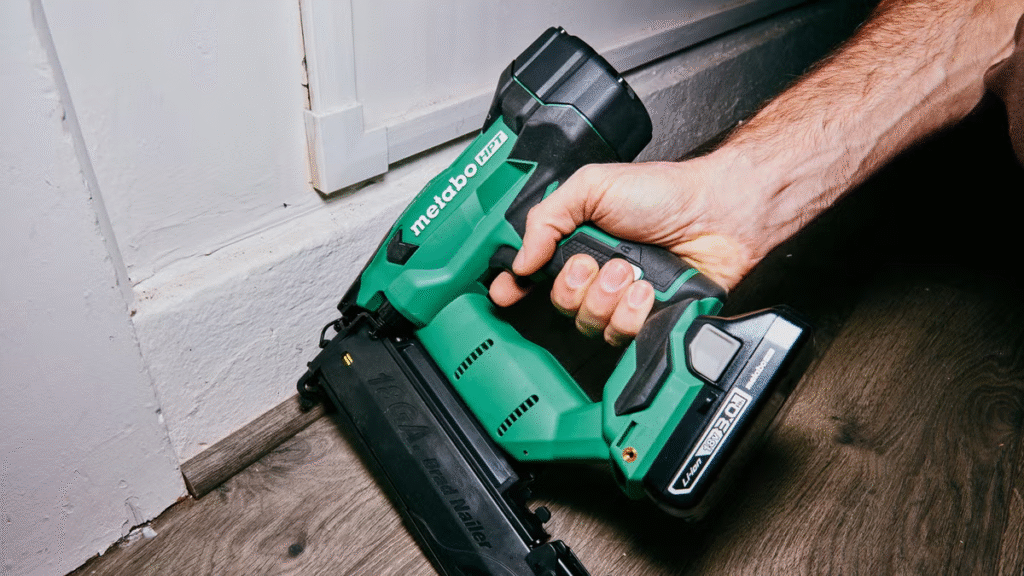
Nothing says “professional finish” like trim attached with nails instead of visible screws. A brad nailer shoots thin 18-gauge nails that hold trim, moldings, and thin panels securely while leaving nearly invisible holes. I installed all the crown molding, baseboards, and window casings in my home with mine, and the results look like I hired a carpenter.
Pneumatic models require an air compressor but are lighter and more affordable. Battery-powered models offer cordless freedom but cost more. The nails range from 5/8 inch to 2 inches — longer nails for thicker trim, shorter for thin moldings. For 2026 home upgrades involving any trim or decorative woodwork, this tool is transformative.
Key Information:
- Price Range: $80 – $250 (pneumatic); $200 – $400 (battery)
- Best Use Cases: Installing trim, molding, thin panels, and decorative woodwork
- Nail Length: Use nails long enough to penetrate 3/4 inch into the framing behind the trim
- Pro Tip: Set the depth adjustment so nails sit just below the surface — fill with wood filler for invisible results
10. Finish Nailer (16-Gauge)
When you need more holding power than a brad nailer provides, step up to a 16-gauge finish nailer. The slightly thicker nails hold heavier trim, door jambs, and built-in cabinetry securely. I used mine to install thick baseboards, attach window and door casings, and build a custom closet organizer.
The nails have more heads than brads, so they hold better in softwoods and MDF. The tool is slightly bulkier than a brad nailer, but the extra strength is noticeable. For home upgrades involving substantial woodwork or built-ins, this is the tool you reach for when brads aren’t enough.
Key Information:
- Price Range: $100 – $280 (pneumatic); $250 – $450 (battery)
- Best Use Cases: Heavy trim, door casings, built-in shelving, and cabinet face frames
- Holding Power: 16-gauge nails have nearly twice the shear strength of 18-gauge brads
- Pro Tip: Angle the nail slightly (toenail) when nailing near the edge of thin trim to prevent splitting
🛠️ Hand Tools and Tips on Home Upgrades
Don’t underestimate hand tools. They offer control, precision, and portability that power tools can’t match — plus they work when the power goes out.
11. Tape Measure (25-Foot)
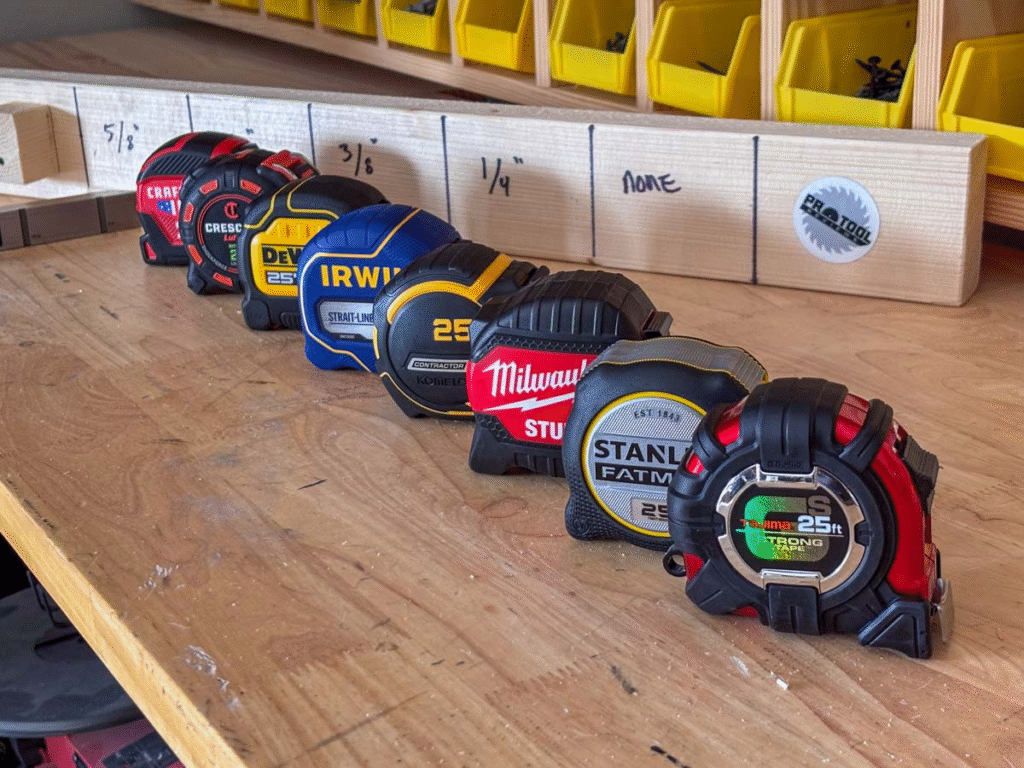
I know, I know — a tape measure seems too basic to include. But hear me out: a quality tape measure with a sturdy hook, clear markings, and a blade that doesn’t flop when extended is worth every penny. I bought a cheap one years ago and spent more time fighting the retraction spring than measuring. Upgrading to a quality 25-footer changed everything.
Look for one with a magnetic hook (sticks to metal studs and ductwork), fractional markings (saves mental math), and a wide blade that extends 8+ feet without bending. For 2026 home upgrades, accurate measurements are the foundation of every successful project — literally nothing else matters if your cuts are wrong.
Key Information:
- Price Range: $15 – $40
- Best Use Cases: Every single measurement in every single project
- Feature to Look For: Magnetic hook, fractional markings, and a stand-out blade of 8+ feet
- Pro Tip: “Measure twice, cut once” isn’t just a saying — it’s the difference between professional results and wasted material
12. Speed Square
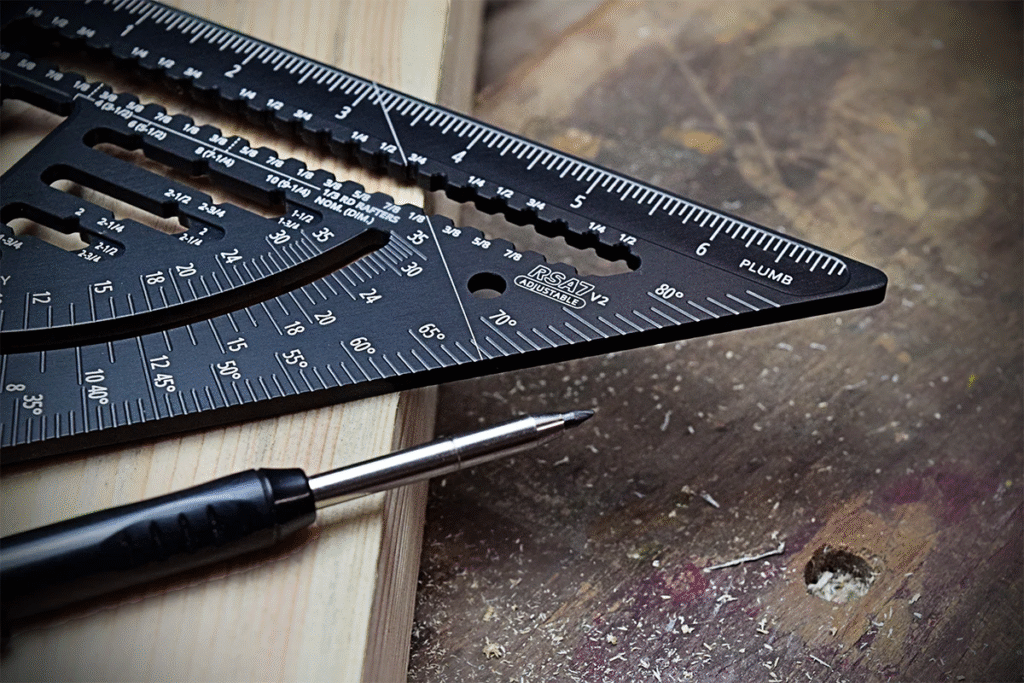
This triangular aluminum tool is a carpenter’s secret weapon. It combines a try square, miter square, protractor, line scriber, and saw guide in one compact package. I use mine constantly — marking 90-degree and 45-degree cut lines, checking corners for square, and as a fence for my circular saw when cutting lumber.
The lip hooks over the edge of your board, giving you an instant square reference. The degree markings let you set any angle for custom cuts. For home upgrades involving framing, decking, or any angled cuts, this $10 tool delivers incredible value.
Key Information:
- Price Range: $8 – $20
- Best Use Cases: Marking square and 45-degree cuts, checking corners, saw guide
- Size Tip: The 7-inch model handles 2x lumber; 12-inch is better for wider boards
- Pro Tip: Scribe a line along the inside edge of the lip — it becomes a perfect 1/4-inch or 1/2-inch marking gauge
13. Level (4-Foot and Torpedo)
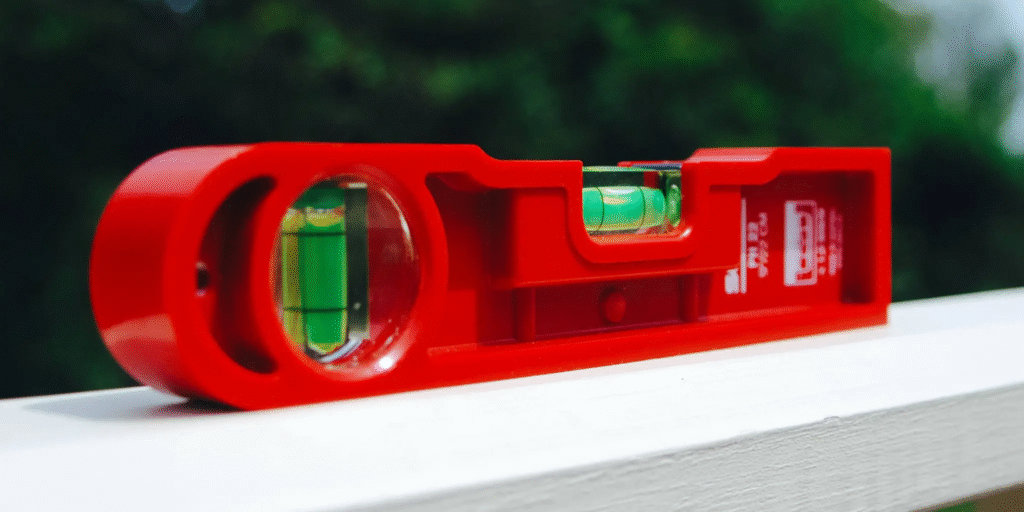
Nothing looks worse than a crooked shelf, a tilted picture frame, or a door frame that’s visibly out of plumb. A 4-foot level ensures your work is perfectly horizontal and vertical over long distances, while a torpedo level checks small spaces and pipe slopes. I check every installation with mine — it’s saved me from countless “I’ll fix it later” mistakes.
Modern levels have magnetic edges, v-grooves for pipes, and multiple vials for different angles. The torpedo level fits in your pocket for quick checks. For 2026 home upgrades, straight and level isn’t optional — it’s what separates DIY from “did it yourself well.”
Key Information:
- Price Range: $20 – $60 (4-foot); $8 – $20 (torpedo)
- Best Use Cases: Checking walls for plumb, shelves for level, pipes for proper slope
- Accuracy Tip: Test your level on a flat surface, flip it end-for-end — the bubble should read the same both ways
- Pro Tip: A laser level projects straight lines across entire rooms — worth the investment for large projects
14. Utility Knife
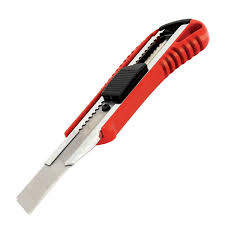
A sharp utility knife is indispensable for scoring drywall, trimming shims, cutting carpet, opening packages, and a hundred other tasks. The retractable blade lets you extend just enough for the job, and when the tip dulls, you snap off a segment for a fresh edge. I probably use mine more than any other hand tool.
Buy one with a comfortable grip and easy blade changes. Some models store spare blades in the handle — incredibly convenient. For home upgrades, this is the tool you reach for when scissors are too clumsy and a saw is too aggressive.
Key Information:
- Price Range: $8 – $25
- Best Use Cases: Cutting drywall, trimming shims, scoring materials, opening packages
- Blade Tip: Buy blades in bulk — a dull blade is more dangerous than a sharp one because it requires more force
- Pro Tip: Extend the blade just past the material thickness — less blade flex means cleaner, safer cuts
15. Chisel Set (1/4″, 1/2″, 3/4″, 1″)
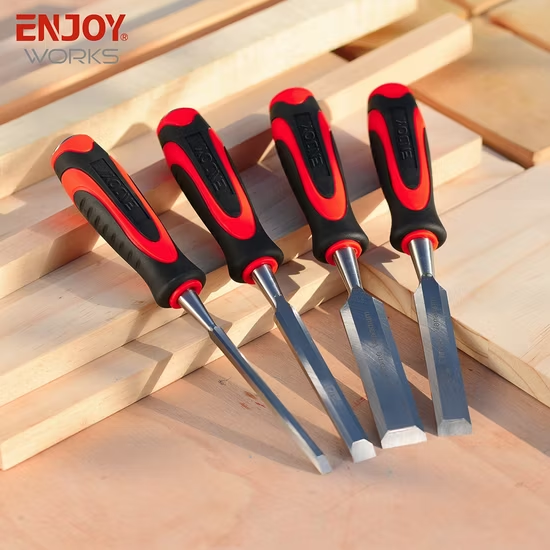
Chisels are the precision cutting tools of woodworking. They pare wood to exact dimensions, clean up mortises, remove old paint, and create decorative details. I used mine to mortise hinges into new doors, clean up dado joints for built-in shelving, and shave down a door that stuck in humid weather.
Quality chisels hold an edge longer and feel balanced in your hand. Keep them sharp — a dull chisel is frustrating and dangerous because it requires hammering instead of controlled paring. For 2026 home upgrades involving custom woodwork, a sharp chisel set is irreplaceable.
Key Information:
- Price Range: $30 – $100 (set of 4)
- Best Use Cases: Mortising hinges, cleaning joints, paring wood to fit, removing old caulk
- Sharpness Tip: Learn to sharpen on water stones — sharp chisels are a joy to use; dull ones are miserable
- Pro Tip: Use a wooden mallet, not a steel hammer — it delivers controlled force without mushrooming the handle
16. Pry Bar / Crowbar
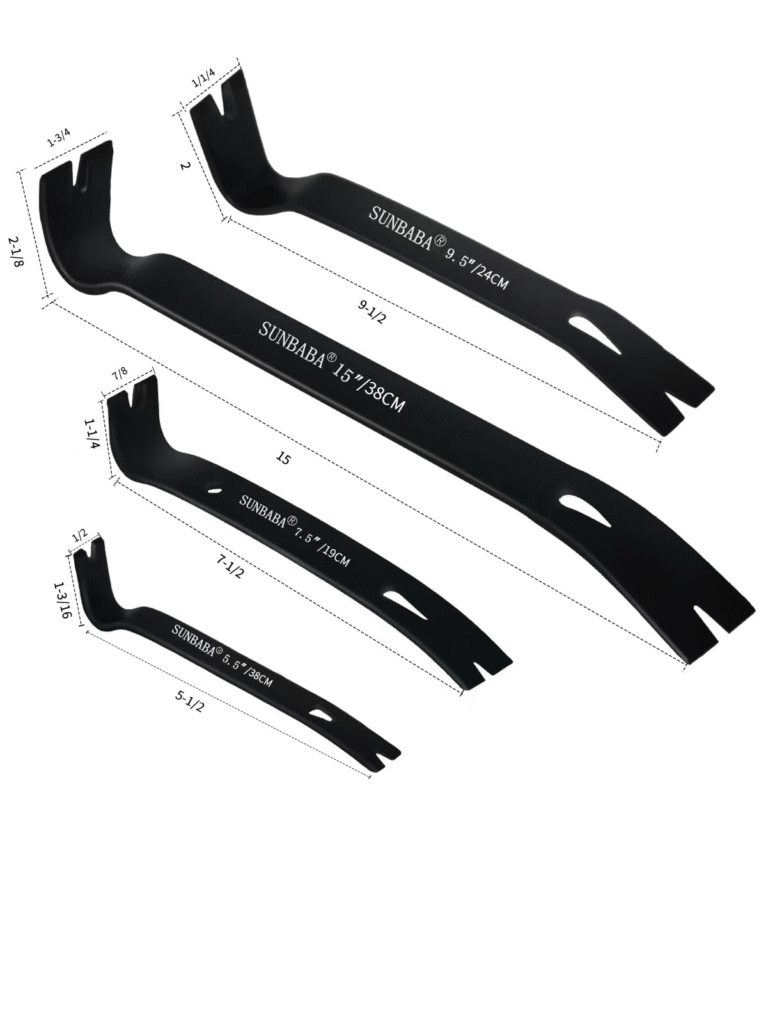
Demolition and renovation go hand in hand, and a good pry bar is your leverage multiplier. Whether you’re removing old trim without damaging walls, prying up flooring, or dismantling a deck, the right pry bar makes the work faster and your body happier. I have three sizes — a small flat bar for trim, a medium claw bar for general demo, and a big wrecking bar for serious demolition.
The flat bar slides behind trim with minimal wall damage. The claw end grips nails for extraction. For home upgrades starting with removal, this tool prevents the frustration of fighting materials with inadequate leverage.
Key Information:
- Price Range: $10 – $35
- Best Use Cases: Removing trim, prying up flooring, nail removal, general demolition
- Size Tip: A 15-inch flat bar handles most trim removal; a 24-inch claw bar tackles bigger jobs
- Pro Tip: Place a scrap of wood under the pry bar’s fulcrum point — it distributes pressure and prevents denting finished surfaces
17. Clamps (Assorted Sizes)
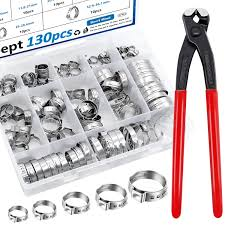
You can never have too many clamps. They hold pieces together while glue dries, secure guides for cutting, and stabilize wobbly workpieces. I started with four and now own twenty-plus in various styles — bar clamps, C-clamps, spring clamps, and pipe clamps. For every home upgrade project, clamps are the extra set of hands you wish you had.
Bar clamps apply even pressure across wide panels. C-clamps hold metal fixtures for drilling. Spring clamps are perfect for quick holds and keeping drop cloths in place. For 2026 home upgrades, buy more clamps than you think you need — you’ll use them all.
Key Information:
- Price Range: $5 – $30 each (varies by type and size)
- Best Use Cases: Holding glue-ups, securing cutting guides, stabilizing workpieces
- Variety Tip: Start with 4-6 bar clamps (12″ and 24″), 2-4 C-clamps, and a handful of spring clamps
- Pro Tip: Clamp a straight board to your workpiece as a saw guide — it turns any saw into a track saw
18. Stud Finder
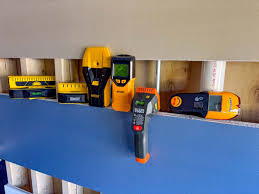
Hanging heavy shelves, mounting TVs, or installing grab bars requires anchoring into wall studs — not just drywall. A stud finder locates the wooden or metal framing behind your walls so you know exactly where to drill. I learned the hard way that “knocking and guessing” leads to crooked mounts and unnecessary wall holes.
Modern electronic stud finders detect wood, metal, and even live electrical wiring. Some models show the stud’s center, edges, and depth. For home upgrades involving wall-mounted fixtures, this tool prevents costly mistakes and ensures your installations are secure.
Key Information:
- Price Range: $15 – $50
- Best Use Cases: Locating studs for shelving, TV mounts, cabinets, and heavy fixtures
- Feature to Look For: Deep scan mode for thick plaster or tile, and AC detection for avoiding electrical wires
- Pro Tip: Mark stud locations with painter’s tape — it gives you a visual reference without permanent marks on the wall
🎨 Painting and Finishing Tools and Tips on Home Upgrades
A quality paint job transforms a room more than almost any other upgrade. These tools ensure professional results.
19. Angled Sash Brush (2.5-Inch)
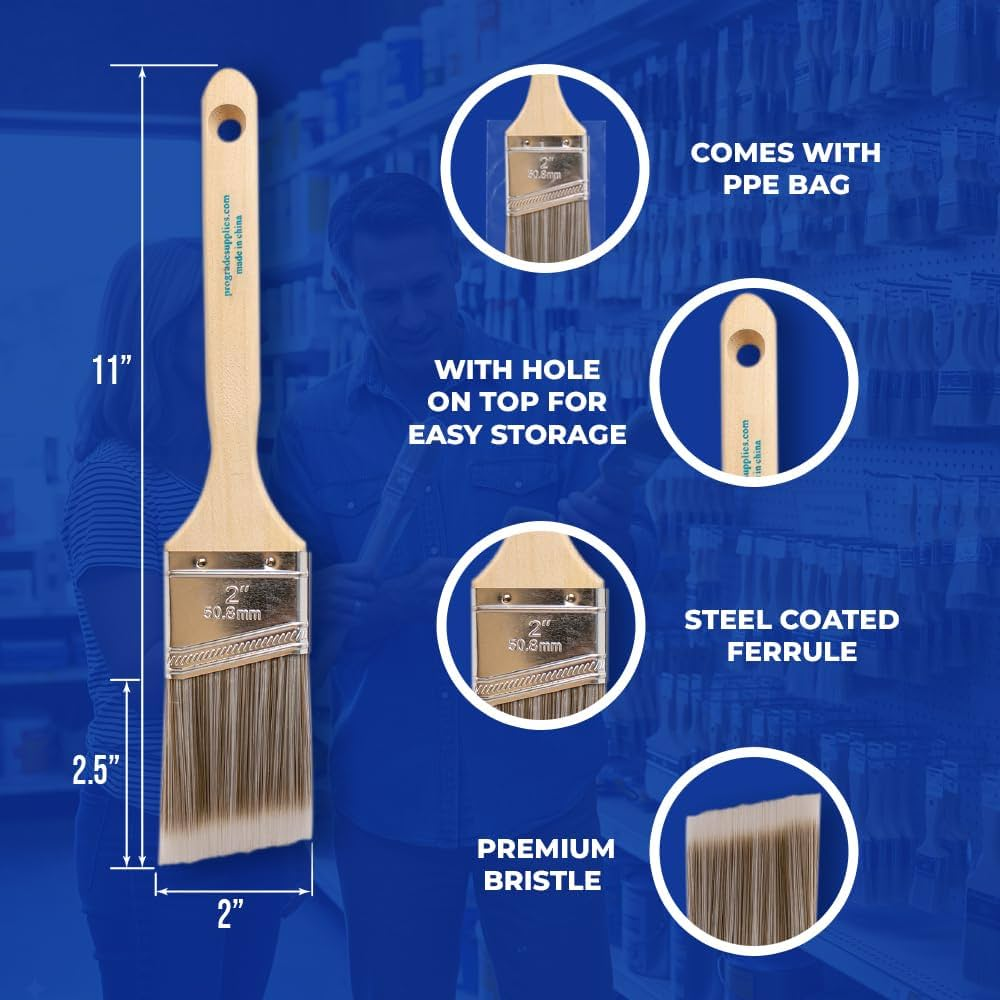
The angled sash brush is the secret to cutting crisp, clean lines along trim, ceilings, and corners without tape. The angled bristles let you “cut in” paint with precision, and a quality brush holds more paint, releases it evenly, and doesn’t leave bristles behind. I can cut in a ceiling line freehand now, but I couldn’t have learned without a good brush.
Natural bristle brushes work best with oil-based paints; synthetic bristles (nylon/polyester) are perfect for latex. For 2026 home upgrades involving any painting, invest in one quality sash brush — it’s the difference between “painted” and “professionally painted.”
Key Information:
- Price Range: $12 – $30
- Best Use Cases: Cutting in edges, painting trim, detailed work
- Bristle Type: Synthetic for latex paint, natural bristle for oil-based paint
- Pro Tip: Load only the bottom third of the bristles with paint — overloaded brushes drip and create uneven lines
20. Paint Roller Frame with Extension Pole

Rolling paint covers large areas quickly and evenly. A quality roller frame doesn’t slip or squeak, and an extension pole saves your back and shoulders on ceilings and tall walls. I painted my entire two-story foyer from the floor using an extension pole — no ladder needed for most of it.
The nap (fuzziness) of the roller cover matters: 3/8-inch for smooth walls, 1/2-inch for slightly textured surfaces, and 3/4-inch or more for rough textures like stucco. For home upgrades involving room painting, the right roller makes the job faster and the finish smoother.
Key Information:
- Price Range: $8 – $25 (frame); $10 – $25 (extension pole)
- Best Use Cases: Painting walls and ceilings quickly and evenly
- Nap Selection: 3/8″ for smooth walls, 1/2″ for light texture, 3/4″+ for heavy texture
- Pro Tip: Roll in a “W” or “M” pattern, then fill in without lifting the roller — it prevents lap marks and ensures even coverage
21. Painter’s Tape (Blue or Green)
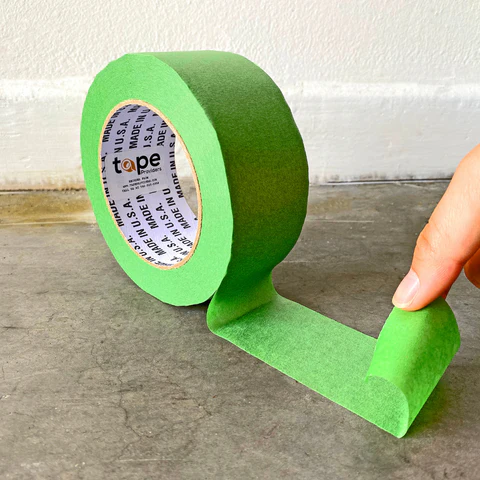
Painter’s tape is the insurance policy for clean paint lines. It masks off trim, ceilings, and areas you don’t want to paint. The key is using the right tape for the job — blue tape for general masking, green Frog Tape for delicate surfaces or when you need the absolute sharpest lines.
I used to skip taping to save time, but I spent more time fixing mistakes than taping would have taken. For 2026 home upgrades, take the time to tape properly — press the edges firmly with a putty knife to seal against bleed-through.
Key Information:
- Price Range: $6 – $15 per roll
- Best Use Cases: Masking trim, ceilings, and adjacent surfaces for clean paint lines
- Tape Selection: Blue tape for general use; green Frog Tape for delicate surfaces or razor-sharp lines
- Pro Tip: Remove tape while paint is still slightly tacky — waiting until fully dry can peel the paint with the tape
22. Caulk Gun
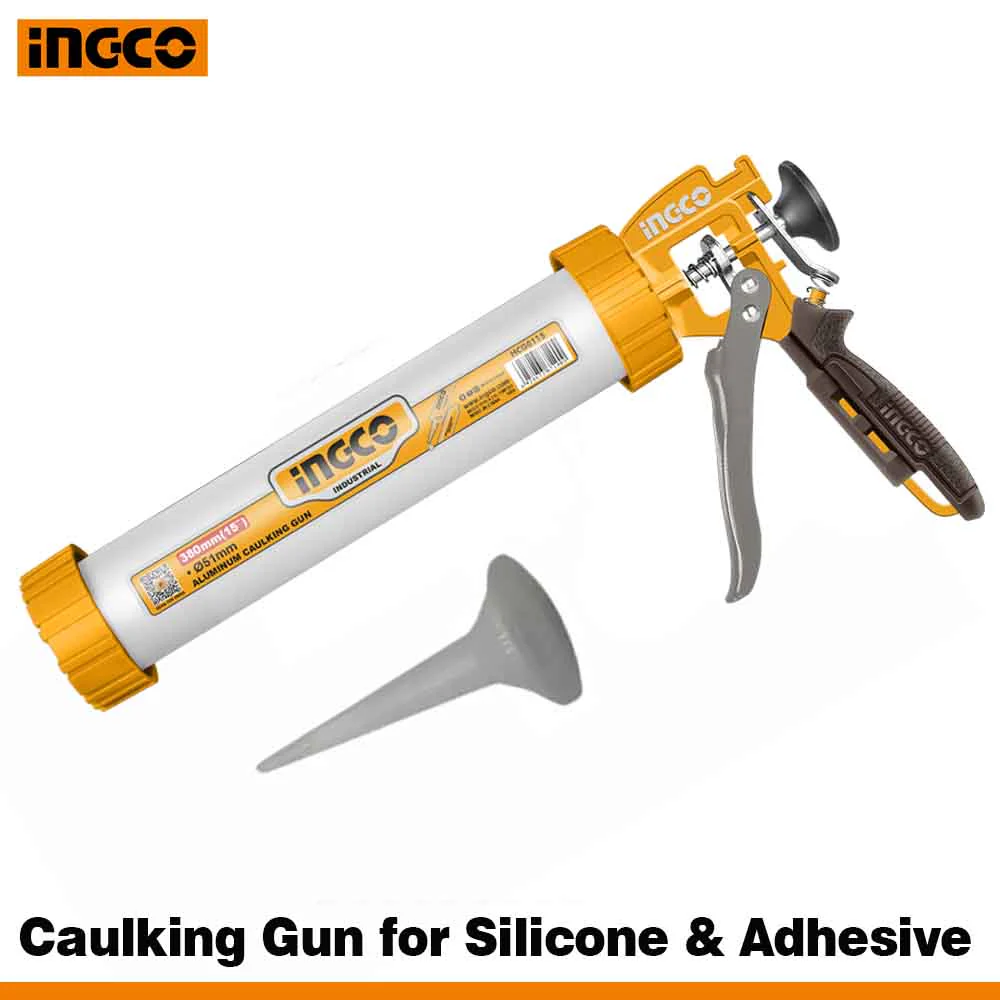
Caulking is the finishing touch that seals gaps, prevents water damage, and gives upgrades a professional appearance. A quality caulk gun with a smooth pressure rod (not ratchet-style) dispenses caulk evenly without the drips and gaps that cheap guns cause. I caulked every baseboard, window, and door frame in my home — the difference in appearance is dramatic.
Dripless models retract the plunger slightly when you release the trigger, preventing the constant ooze that makes caulking messy. For home upgrades involving kitchens, bathrooms, trim, or exterior sealing, a good caulk gun is essential.
Key Information:
- Price Range: $10 – $30
- Best Use Cases: Sealing baseboards, windows, doors, tubs, sinks, and exterior gaps
- Dripless Feature: Worth the extra cost — prevents mess and wasted caulk
- Pro Tip: Cut the caulk tube nozzle at a 45-degree angle, opening size matching the gap width — and smooth with a wet finger for a perfect bead
23. Putty Knife Set (1″, 3″, 6″)
Putty knives spread joint compound, scrape old paint, apply wood filler, and clean up excess caulk. The flexible blades conform to surfaces for smooth application, while stiff blades scrape aggressively. I use my 3-inch knife daily — it’s the perfect size for most tasks.
Stainless steel blades resist rust if you forget to clean them immediately (it happens). A 6-inch knife is great for spreading joint compound over large drywall patches. For 2026 home upgrades involving drywall repair, paint prep, or finish work, this set covers all the bases.
Key Information:
- Price Range: $10 – $25 (set of 3)
- Best Use Cases: Spreading joint compound, scraping paint, applying filler, cleaning excess caulk
- Flexibility Tip: Flexible blades for smoothing; stiff blades for scraping
- Pro Tip: Hold the knife at a low angle (almost flat to the surface) when spreading compound — it prevents gouging and creates a smoother finish
🔧 Specialty Tools and Tips on Home Upgrades
These tools solve specific problems that come up repeatedly during home improvement projects.
24. Drywall Saw (Jab Saw)
When you need to cut openings in drywall for electrical boxes, light fixtures, or plumbing access, a drywall saw is the right tool. The pointed tip lets you “jab” through the drywall to start the cut, and the aggressive teeth rip through gypsum quickly. I used mine to install recessed lighting, add cable outlets, and repair water-damaged ceiling sections.
The coarse teeth are designed for gypsum — don’t use them on wood or they’ll dull quickly. For home upgrades involving any wall or ceiling modifications, this inexpensive tool saves hours compared to trying to make these cuts with a utility knife.
Key Information:
- Price Range: $8 – $20
- Best Use Cases: Cutting drywall openings for outlets, fixtures, and access panels
- Blade Tip: Coarse teeth for drywall only — using on wood dulls the blade fast
- Pro Tip: Trace your cutout on the wall, then score the perimeter with a utility knife before sawing — it prevents tearing the paper face beyond your cut line
25. Tile Cutter (Manual)
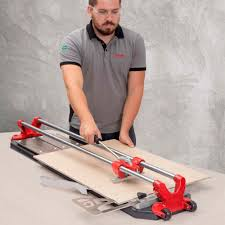
If your 2026 upgrade plans include a backsplash, bathroom tile, or flooring, a manual tile cutter scores and snaps ceramic and porcelain tiles cleanly. It’s faster than a wet saw for straight cuts, quieter, and doesn’t require water or electricity. I tiled my kitchen backsplash and bathroom floor with mine — straight cuts are effortless.
The cutter scores the tile surface with a carbide wheel, then applies pressure to snap it cleanly along the score. For complex cuts (L-shapes, curves), you’ll still need a wet saw or angle grinder, but for the majority of straight cuts, this tool is perfect.
Key Information:
- Price Range: $30 – $100
- Best Use Cases: Straight cuts in ceramic and porcelain tile for backsplashes and flooring
- Tile Size: Buy a cutter rated for your largest tile — a 20-inch cutter handles most home projects
- Pro Tip: Score in one firm, continuous motion — multiple light scores create uneven breaks and chipped edges
26. Grout Float
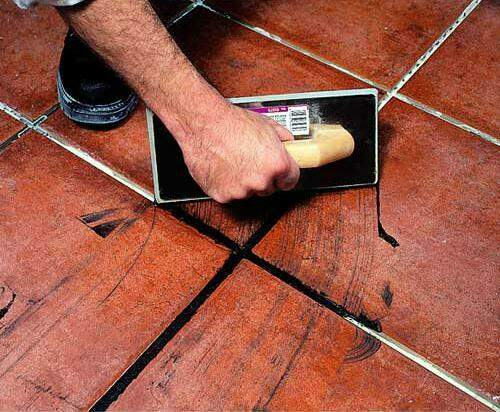
After setting tiles, you press grout into the joints with a grout float — a flat rubber pad with a handle. The rubber is firm enough to push grout deep into joints but flexible enough to squeegee excess grout off the tile surface. I grouted two bathrooms and a kitchen backsplash with mine, and it made the process surprisingly manageable.
The float’s edge cleans grout lines as you work, leaving just enough in the joints. For home upgrades involving tile work, don’t try to grout with a trowel or sponge alone — the float is designed specifically for this job.
Key Information:
- Price Range: $8 – $20
- Best Use Cases: Pressing grout into tile joints and removing excess
- Material Tip: Rubber floats for epoxy grout; foam floats for sanded/unsanded cement grout
- Pro Tip: Hold the float at a 45-degree angle and move diagonally across the tiles — it prevents pulling grout out of the joints
27. Shop Vacuum (Wet/Dry)
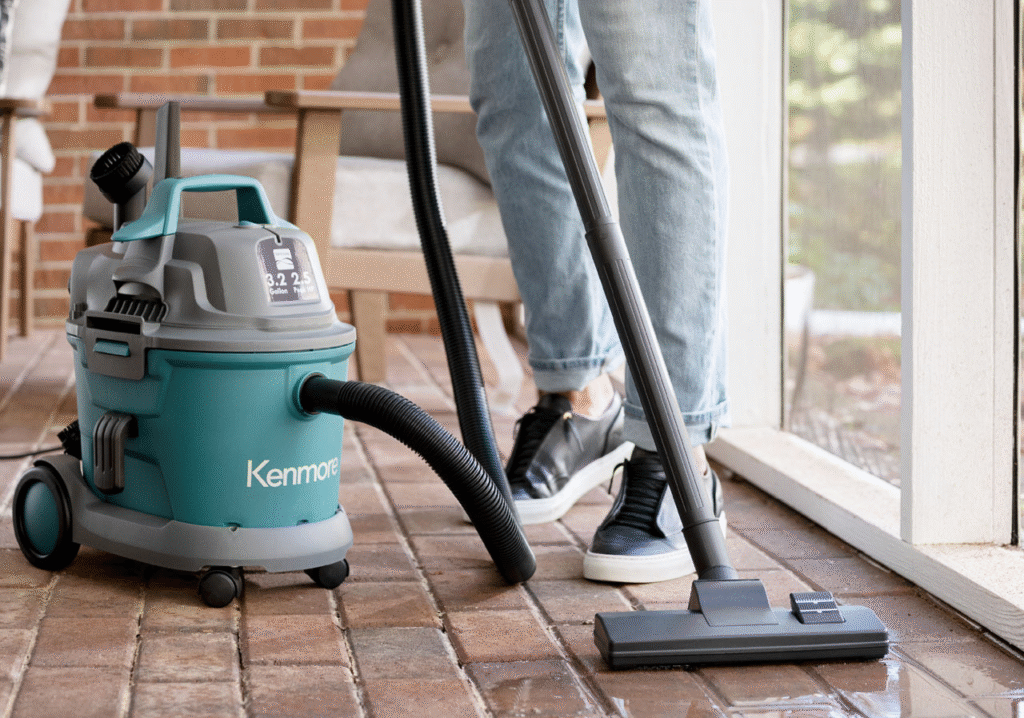
A shop vac is the cleanup hero of home upgrades. It sucks up sawdust, drywall debris, spilled water, and demolition mess that would take hours to sweep. I use mine after every project — it keeps my workspace safe and my lungs happier. The wet capability is a lifesaver when a pipe leaks or you need to drain a water heater.
Look for one with a HEPA filter option if you’re doing lots of drywall or lead paint work. For 2026 home upgrades, a shop vac isn’t optional — it’s the tool that lets you work cleanly and safely.
Key Information:
- Price Range: $60 – $200
- Best Use Cases: Cleaning sawdust, drywall dust, water spills, and demolition debris
- Capacity Tip: A 12-16 gallon capacity handles most home projects without constant emptying
- Pro Tip: Buy a dust deputy cyclone separator — it captures fine dust before it reaches the vacuum filter, extending filter life dramatically
28. Knee Pads
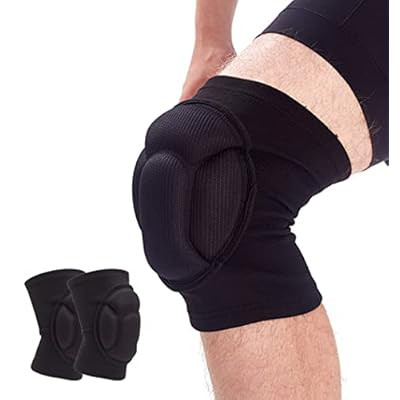
This might seem like an odd “tool,” but after spending a day installing flooring on bare knees, you’ll understand. Quality knee pads with thick foam or gel cushioning protect your joints during flooring, tiling, baseboard installation, and any work close to the ground. I ignored knee protection for years and paid for it with chronic knee pain.
Strap-on styles stay in place better than slip-on when you’re moving around. For home upgrades involving flooring, tiling, or extended time on your knees, this $20 investment protects your body so you can keep tackling projects for years to come.
Key Information:
- Price Range: $15 – $40
- Best Use Cases: Flooring installation, tiling, baseboard work, any extended kneeling
- Style Tip: Strap-on models with gel or thick foam padding offer the best protection and stay in place
- Pro Tip: Wear them over lightweight pants — bare skin gets pinched by straps and sweaty against padding
29. Work Light (LED)
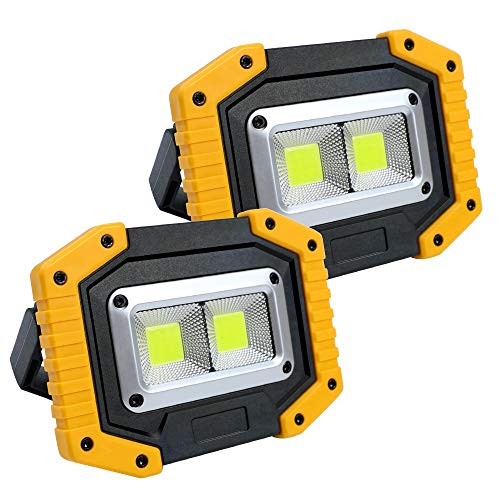
Most home upgrade work happens in basements, closets, under cabinets, or in other poorly lit spaces. A bright LED work light transforms these dim areas into workable spaces. I have a rechargeable LED floodlight that I set up for every project — it eliminates shadows, shows true colors (important for paint and stain matching), and prevents mistakes caused by poor visibility.
Modern LED work lights run for hours on a charge, produce minimal heat, and are surprisingly bright. For 2026 home upgrades, good lighting isn’t a luxury — it’s a safety and quality necessity.
Key Information:
- Price Range: $30 – $100
- Best Use Cases: Illuminating work areas, color-matching paint/stain, safety in dim spaces
- Brightness Tip: Look for 2000+ lumens for general work areas; 5000+ for detailed tasks
- Pro Tip: Position the light to the side of your work, not directly behind you — side lighting reveals surface imperfections that overhead lighting hides
30. Digital Caliper
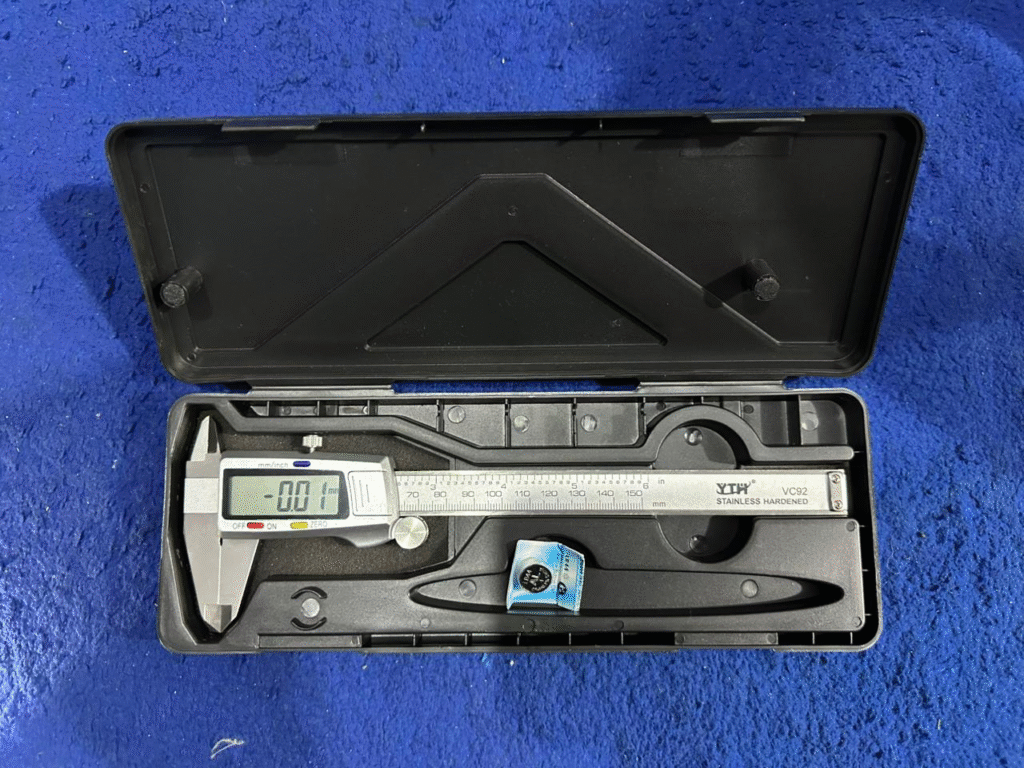
This precision measuring tool reads dimensions to the thousandth of an inch — essential when you need exact fits for hardware, trim, or custom pieces. I use mine to measure drill bit diameters, check lumber thickness, verify pipe sizes, and ensure hardware matches before I make a trip to the store.
Digital models are easier to read than dial or vernier calipers and switch between inches and millimeters instantly. For home upgrades involving custom work, hardware replacement, or any project where “close enough” isn’t close enough, a digital caliper removes guesswork.
Key Information:
- Price Range: $15 – $40
- Best Use Cases: Precise measurement of hardware, lumber, pipe, and fitting dimensions
- Accuracy: Digital calipers measure to 0.001 inch — far more precise than a tape measure
- Pro Tip: Zero the calipers before each measurement, and always measure at multiple points — materials aren’t always perfectly uniform
Smart Strategies: Tools and Tips on Home Upgrades for 2026
Now that you know the tools, here are some overarching tips to make your 2026 home upgrades successful:
Plan Before You Buy
Walk through your planned projects and list every tool you’ll need. Buy the essentials first, then rent specialty tools (wet tile saw, floor sander, etc.) for one-off projects. I’ve wasted money buying tools I used once when renting would have been smarter.
Buy Quality, Not Quantity
One quality tool beats three cheap ones. A $30 tape measure that lasts 10 years is cheaper than three $10 measures that break. For tools you use constantly (drill, level, tape measure), buy the best you can afford.
Safety First, Always
Safety glasses, hearing protection, dust masks, and work gloves aren’t optional — they’re essential. I’ve had a shard of metal fly into my safety glasses during drilling. Without them, that would have been an eye injury. Don’t learn this lesson the hard way.
Organize Your Workspace
A pegboard, tool chest, or even labeled bins save hours of searching. When you can grab the right tool immediately, projects move faster and frustration stays low. I spent a weekend organizing my garage workshop and it paid for itself in the first month.
Know When to Call a Pro
Some upgrades require permits, licensed professionals, or specialized knowledge. Electrical panel work, gas line modifications, and structural changes fall into this category. There’s no shame in hiring experts — it often saves money compared to fixing DIY mistakes.
Final Thoughts on Tools and Tips on Home Upgrades
Home upgrading in 2026 is more accessible than ever thanks to better tools, more tutorials, and improved materials. But the right tools and tips on home upgrades are what transform intimidating projects into achievable weekend victories. Start with the basics, add tools as your skills grow, and don’t be afraid to tackle projects that push your comfort zone.
Every expert was once a beginner. The difference is they started with the right tools and kept learning. Your home is your biggest investment — upgrading it yourself saves money, builds skills, and gives you the unmatched satisfaction of standing back and thinking, “I did that.”
What’s your next home upgrade project? Drop a comment below and let me know which tool from this list you’re most excited to add to your collection!
Happy upgrading, and here’s to a more beautiful home in 2026! 🏡
Related Articles:
- 10 Home Upgrades That Pay for Themselves
- How to Plan a Kitchen Renovation on a Budget
- DIY vs. Professional: When to Hire a Contractor
- 2026 Home Improvement Trends Worth Watching
Keywords: tools and tips on home upgrades, home upgrade tools 2026, DIY home improvement tools, essential tools for home renovation, home upgrade toolkit, best tools for home projects 2026
")
")


")
